

A chandelier adds charm and glow to any space. It can turn a dull room into something special. Yet, chandeliers don’t have to be expensive or hard to find.
With a little creativity, anyone can make one at home. DIY chandeliers are not only fun to build but also give your home a warm, personal touch.
Here are 14 beautiful DIY chandelier ideas that fit every style—from rustic and vintage to modern and artistic.
1. Mason Jar Chandelier
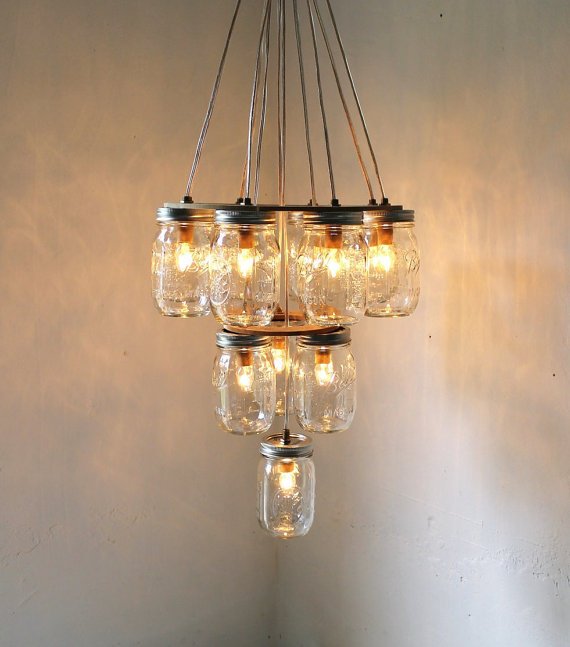
Mason jars make a lovely rustic chandelier. Their glass creates a soft, warm light that feels cozy. Use 4 to 8 jars depending on how large you want your chandelier. Attach the jars to a wooden base or a metal ring with wire or strong twine. Then place fairy lights or small LED bulbs inside each jar.
This idea works beautifully in kitchens, dining areas, or patios. The glass jars reflect the light, adding sparkle and warmth to your space. For extra charm, paint the jars in light pastel colors or frost the glass for a softer glow.
2. Beaded Chandelier
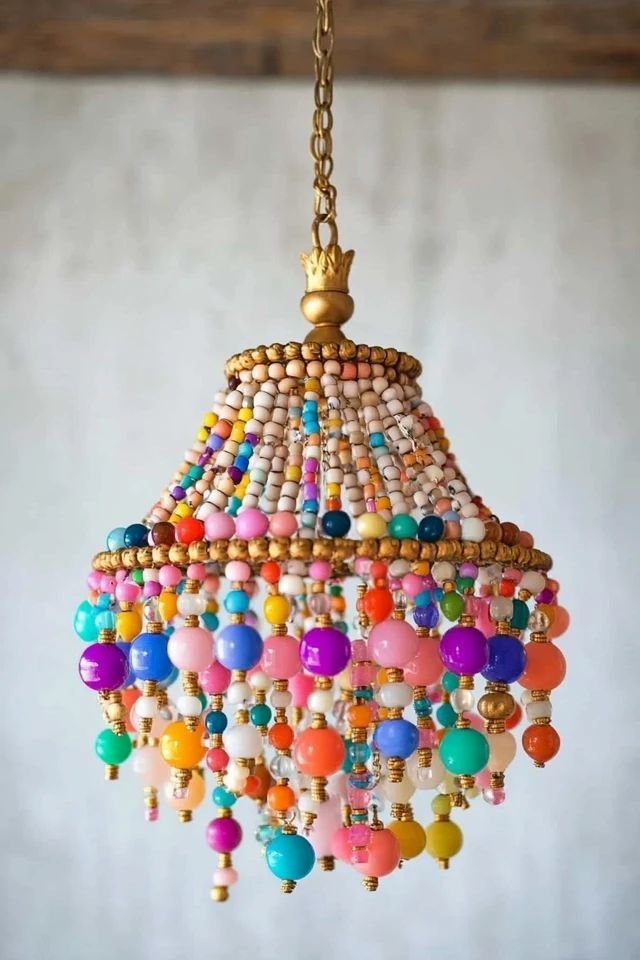
Beads bring elegance and texture. A beaded chandelier can look classy yet simple. Use wooden, plastic, or glass beads depending on your taste. String them on thin wire or fishing line and attach them to a metal or wire frame.
Let the beads drape in layers. You can use white beads for a boho look or colored ones for a more playful style. This project adds movement and light to your ceiling, perfect for bedrooms or living rooms with neutral tones.
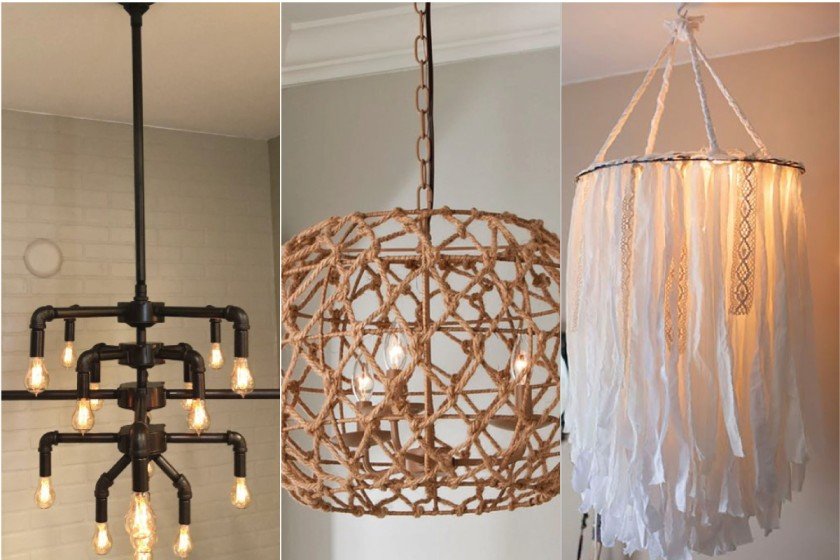
3. Rope and Wood Chandelier
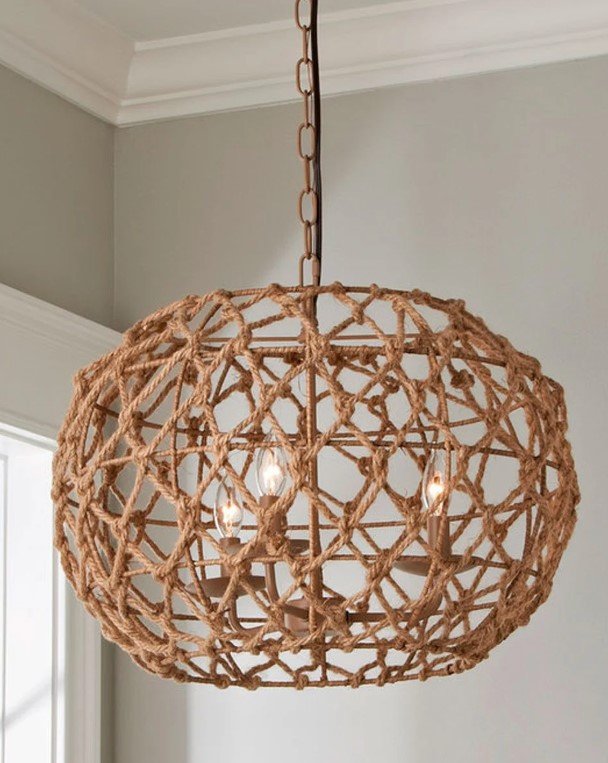
This idea fits farmhouse or coastal themes. Take a wooden board or wheel as your chandelier base. Wrap thick rope around the hanging cords or bulbs. The rope adds texture and warmth while keeping a natural feel.
Hang it over a dining table or kitchen island for a cozy effect. The mix of wood and rope gives the space a grounded and organic look. It’s simple to build, yet it looks stylish and strong.
4. Wine Bottle Chandelier
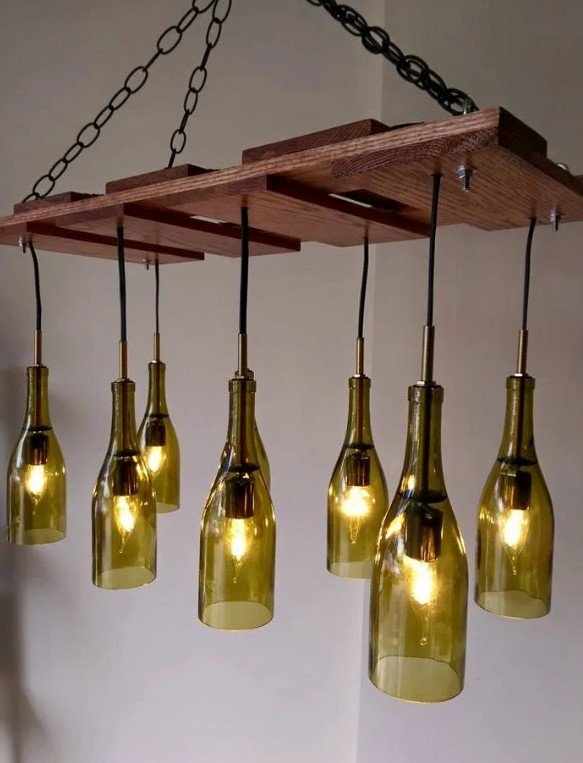
Empty wine bottles can become beautiful light fixtures. Cut the bottom of each bottle with a glass cutter. Thread a small bulb inside each one. Then, hang the bottles from a wooden or metal base using strong cords.
The light shining through colored glass creates a soft, romantic glow. Green or brown bottles look rustic, while clear bottles feel modern and clean. This project is perfect for a bar area or outdoor dining space.
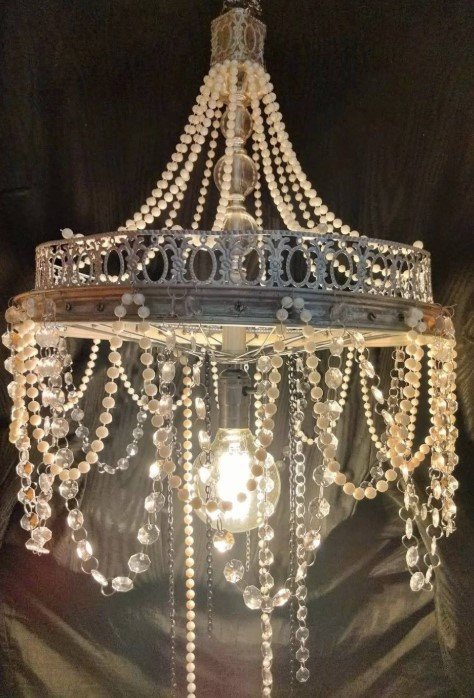
5. Crystal Drop Chandelier
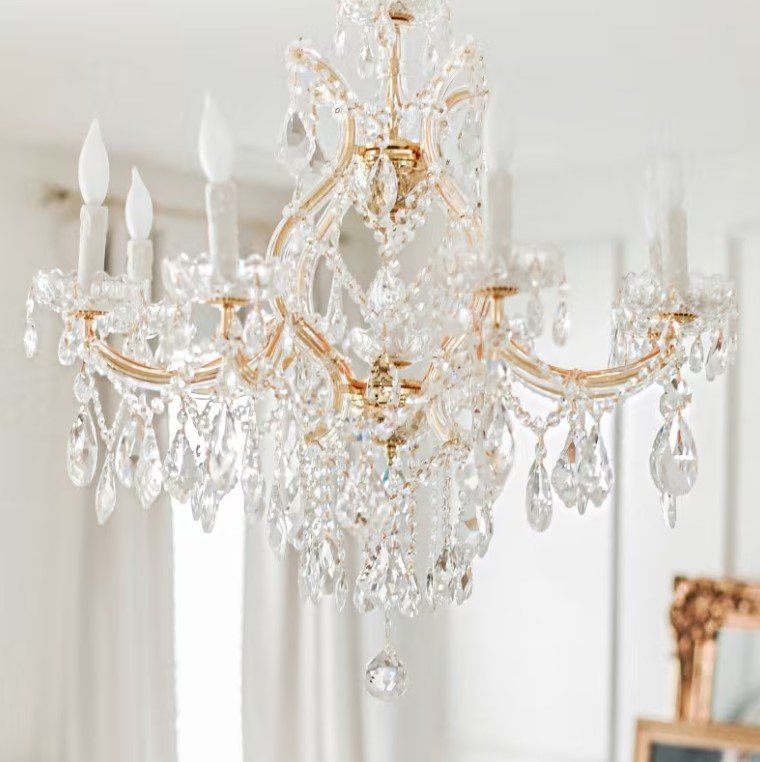
This is for those who love sparkle and glamour. Get a metal frame or repurpose an old chandelier base. Add crystal drops or clear glass pendants with small hooks or thin wire.
The light will bounce off the crystals, creating a glittering effect. This chandelier fits nicely in bedrooms, entryways, or formal dining rooms. It brings elegance and old-world charm without being too fancy to make.
6. Paper Flower Chandelier
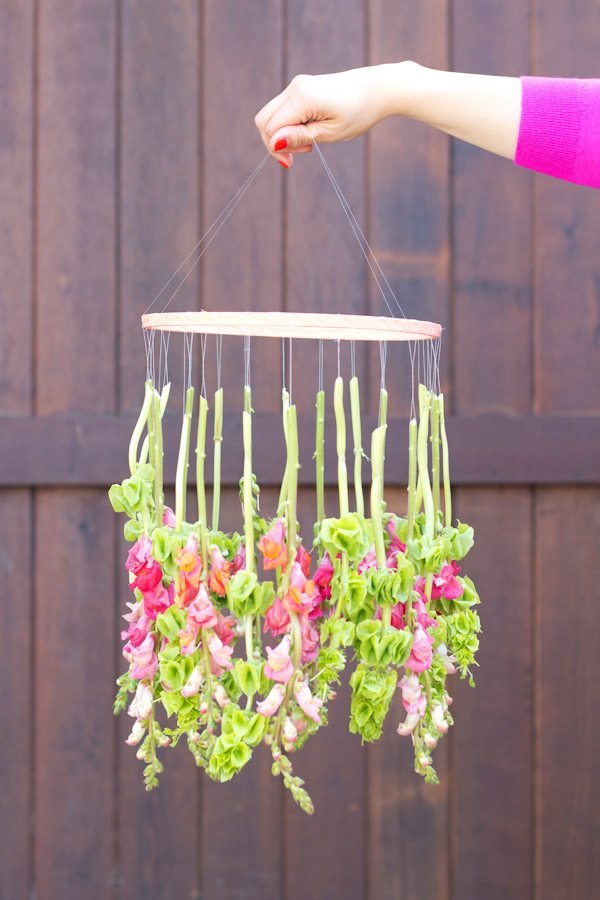
A paper flower chandelier adds color and cheer to any room. Cut paper into flower shapes using craft paper or tissue paper. Glue them onto a round wire frame or embroidery hoop.
Mix different sizes and colors for a fuller look. This idea is perfect for kids’ rooms, weddings, or garden parties. The soft paper gives a dreamy, floating feel that looks delicate and artistic.
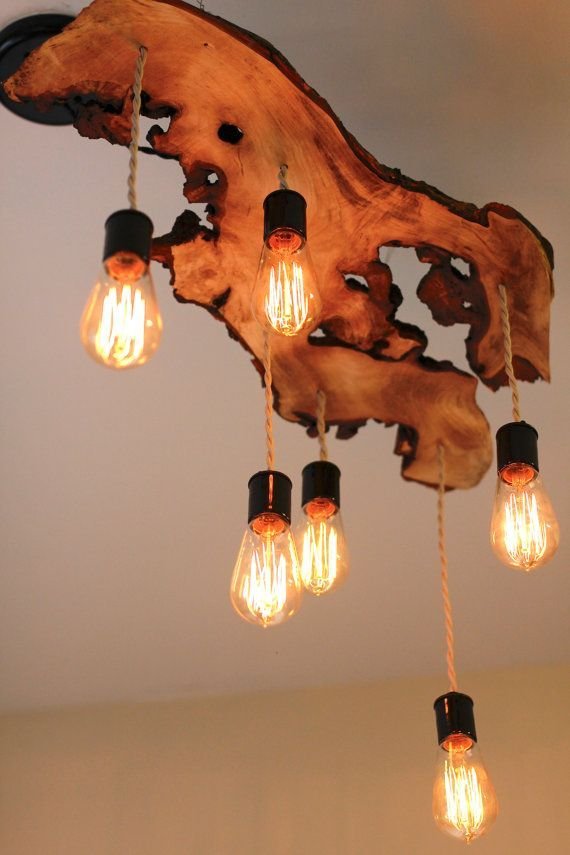
7. Branch and Fairy Light Chandelier
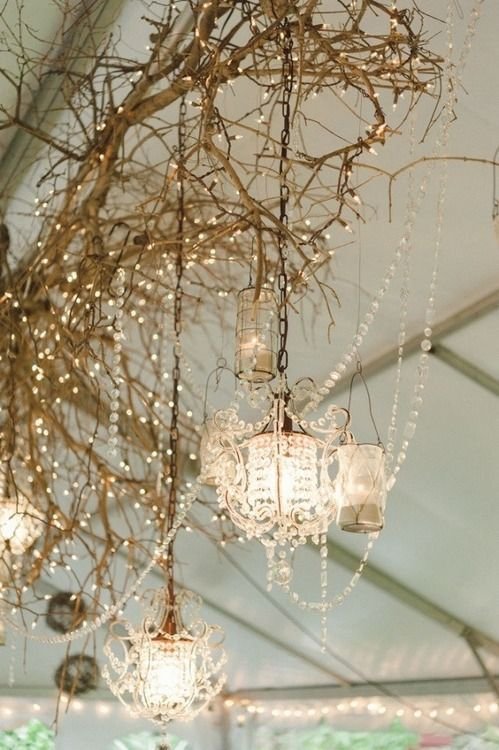
Nature lovers will adore this one. Pick a sturdy tree branch with interesting shape and texture. Clean it and remove the bark if needed. Wrap fairy lights or small bulbs around it.
Hang the branch using strong fishing line or chains. The lights shining through the wood make a peaceful and magical atmosphere. It works great above a dining table or in a reading corner.
8. Hoop and Fabric Chandelier
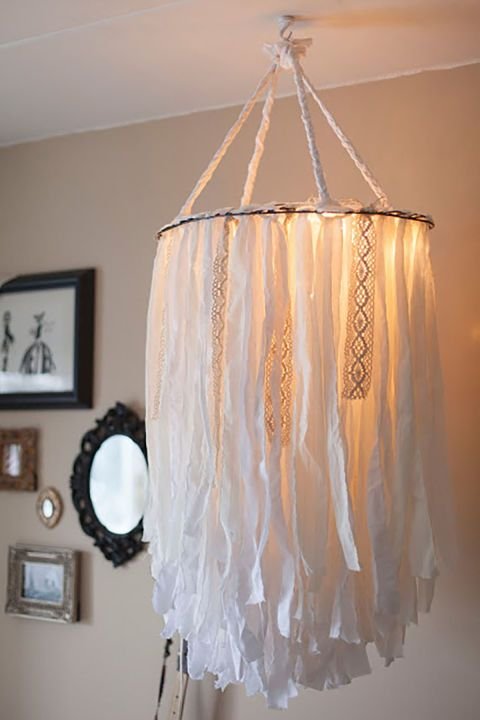
This idea brings softness to your space. Use an embroidery hoop or metal ring as your base. Tie long strips of fabric, lace, or ribbon around it. Let them hang down in layers.
You can add a small LED bulb inside or wrap fairy lights around the hoop. The flowing fabric moves gently, giving your room a light, dreamy touch. Perfect for bedrooms, nurseries, or outdoor events.
9. Rustic Lantern Chandelier
Old lanterns can make a cozy chandelier. Find 3 to 5 matching lanterns. Hang them at different heights from a wooden beam or plank. Inside, place LED candles or bulbs.
This idea brings warmth and country charm. It works beautifully in porches, cabins, or dining spaces. You can even paint the lanterns black or white for a more classic look.
10. Hula Hoop Chandelier
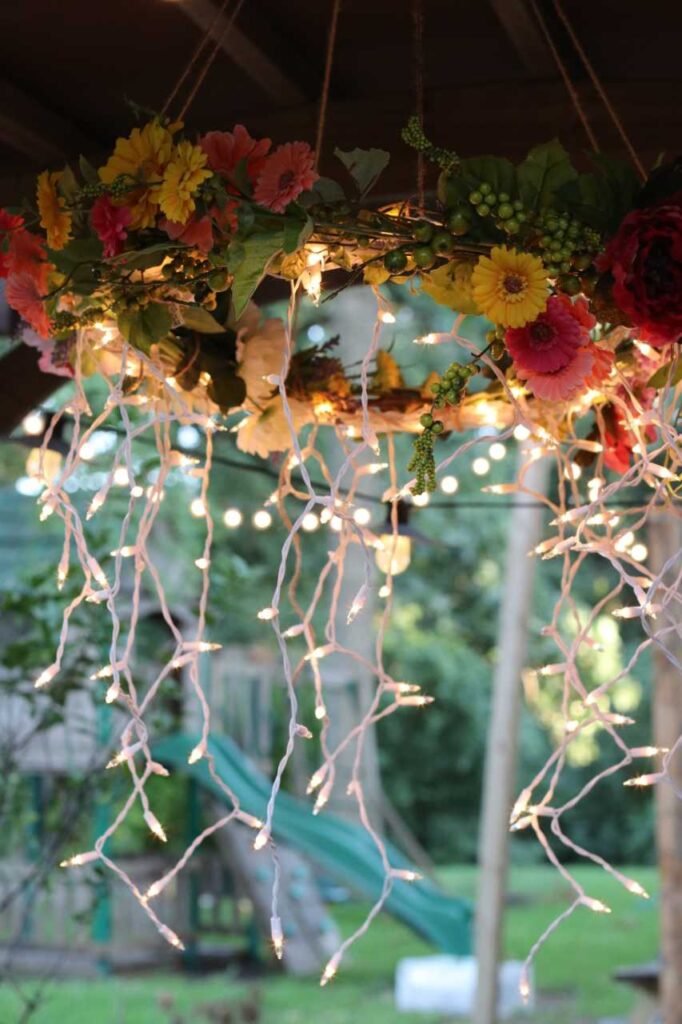
A hula hoop can be the base for many styles of chandeliers. Wrap it in ribbon, jute, or greenery. Add hanging lights or mason jars around the hoop.
This DIY chandelier can be large or small. It fits outdoor parties, weddings, or festive gatherings. It’s light, easy to move, and fun to customize with flowers, leaves, or tulle.
11. Shell Chandelier
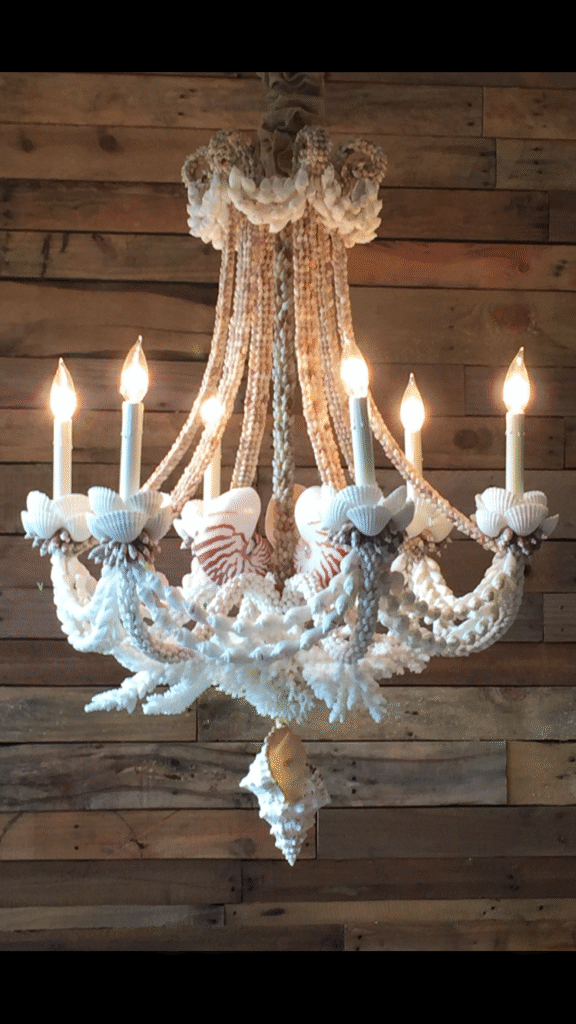
A shell chandelier brings the sound and feel of the ocean indoors. Collect seashells of different sizes and shapes. Drill small holes in each shell and thread them with fishing line.
Hang them in layers from a circular frame or driftwood branch. The shells clink softly and reflect the light, giving your room a beachy vibe. Great for bathrooms or coastal-style living rooms.
12. Industrial Pipe Chandelier
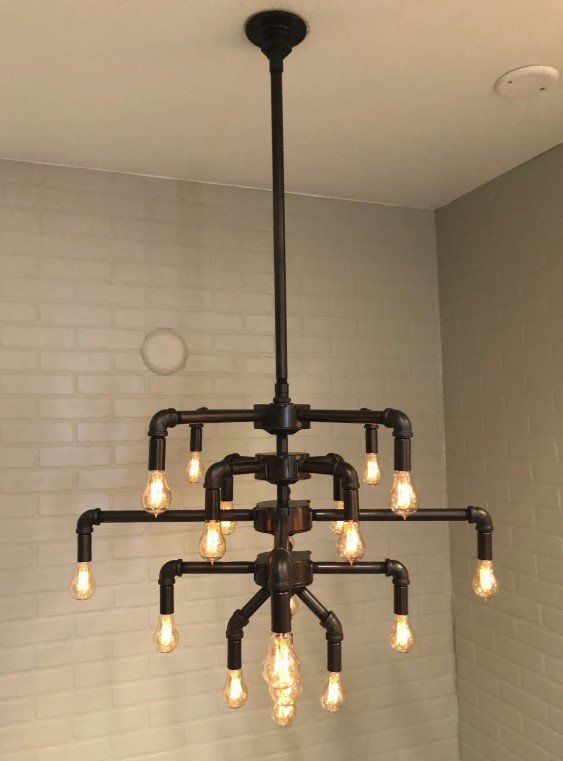
Metal pipes can form a striking chandelier with an industrial edge. Use black iron pipes and fittings to build a frame. Screw in Edison bulbs at each end.
The raw metal and warm bulbs create a bold statement. Hang it over a dining table or workspace for a modern loft look. It’s strong, stylish, and surprisingly easy to put together.
13. Feather Chandelier
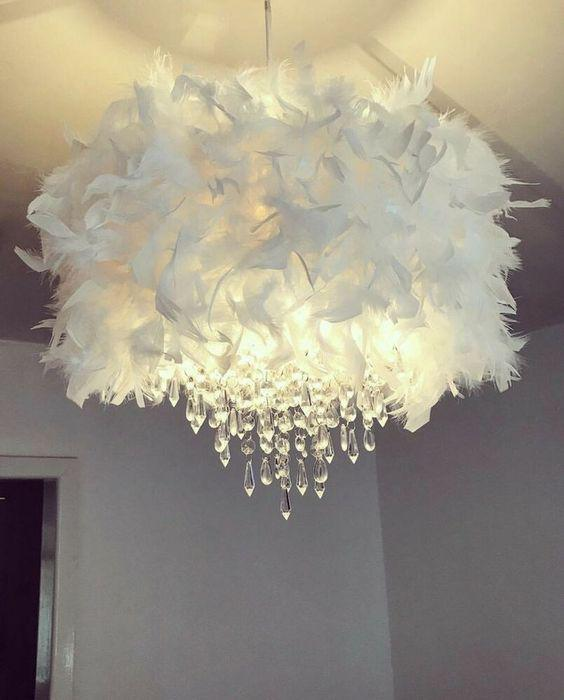
Feathers add softness and movement. Glue white or pastel feathers around a paper lantern or round frame. Use hot glue to attach them in layers for a full, fluffy look.
This chandelier gives a soft, glowing light perfect for bedrooms or nurseries. It feels airy, delicate, and comforting. For a modern twist, use black or metallic feathers instead.
14. Upcycled Bicycle Wheel Chandelier
Turn an old bicycle wheel into a unique chandelier. Clean the wheel and remove the tire. Attach small bulbs or mason jars with string or wire around the rim.
Hang it with sturdy chains from the ceiling. The round shape and metal texture give a quirky, modern-industrial feel. It’s a fun conversation piece for living rooms, patios, or cafés.
Tips for Making DIY Chandeliers
Before starting your project, keep these points in mind:
- Use lightweight materials to avoid ceiling damage.
- Always check wire safety if using real bulbs.
- Try LED lights for energy savings and cool touch.
- Choose colors and textures that match your room theme.
- Add dimmers if you want to control brightness.
Easy Themes to Try
DIY chandeliers can match any theme or space. A few ideas include:
- Boho: Use macramé, beads, and feathers.
- Rustic: Add wood, rope, and mason jars.
- Modern: Use metal, glass, and clean lines.
- Romantic: Include lace, crystals, and soft light.
- Eco-Friendly: Reuse bottles, jars, or paper.
Each design can fit your home’s style and make the space more personal.
Why DIY Chandeliers Are Worth It?
DIY chandeliers cost much less than store-bought ones. They also give you full creative control. You can match them to your furniture, wall color, or mood. The process is relaxing and rewarding.
Making something with your hands brings joy and pride. Each chandelier tells a story — your story. It shows your effort and creativity every time you switch on the light.
Maintenance and Care
Homemade chandeliers need little care. Here are a few simple steps:
- Dust regularly with a soft cloth or feather duster.
- For glass or beads, wipe gently with a damp cloth.
- Avoid harsh cleaners.
- Check bulbs and wires often for safety.
- Keep paper or fabric away from heat sources.
These small habits help your chandelier last longer and stay safe.
Decorating Ideas with DIY Chandeliers
DIY chandeliers work in more than just the dining room. Try them in:
- Bedrooms: Add calm and soft lighting.
- Living Rooms: Create a warm, inviting center.
- Kitchens: Brighten the cooking space stylishly.
- Bathrooms: Add elegance with small lights and crystals.
- Outdoor spaces: Hang waterproof versions under a pergola or porch.
A chandelier draws the eye. It becomes a piece of art and light in one.
Budget-Friendly Materials
You don’t need expensive tools. Many materials are already at home. Common items include:
- Old jars, bottles, or cans
- Twine, rope, or fabric strips
- Wire hangers or metal hoops
- Fairy lights or LED bulbs
- Old frames, baskets, or wheels
Repurposing items keeps costs low and reduces waste. It also makes your design truly yours.
Step-by-Step for Beginners
Here’s a simple way to start your first chandelier project:
- Pick your design style.
- Gather materials.
- Build the frame.
- Attach lights or decorations.
- Test the light safely.
- Hang it from the ceiling with care.
Take your time. No rush. Each step adds beauty to your final piece.
Mistakes to Avoid
Some small errors can spoil the look or safety of your chandelier. Avoid these:
- Using heavy materials on weak ceilings.
- Mixing too many colors or textures.
- Hanging lights too low.
- Forgetting to test wiring.
- Ignoring symmetry or balance.
A little planning saves time and gives a cleaner finish.
Personalizing Your Chandelier
Every home has a different soul. Make your chandelier match it. Add small charms, family photos, or fabric pieces that mean something to you. Use favorite colors or shapes that reflect your style.
This way, your chandelier becomes more than a light. It becomes part of your home’s story.
Benefits of Handmade Chandeliers
DIY chandeliers are more than decoration. They have real benefits:
- Save money.
- Encourage creativity.
- Reduce waste through upcycling.
- Bring warmth and personal meaning.
- Give satisfaction from your own effort.
Each light you make brightens both your home and your mood.
Conclusion
A chandelier changes how a room feels. It adds glow, character, and heart. Building your own saves money and gives you pride in your creation. From mason jars to crystal drops, every design here is easy to try and full of charm.
Making something by hand connects you to your home in a deeper way. You see your style shine every time the light turns on.
Start with one idea. Gather your tools. Create something beautiful that lights up not only your room but your creativity too.