
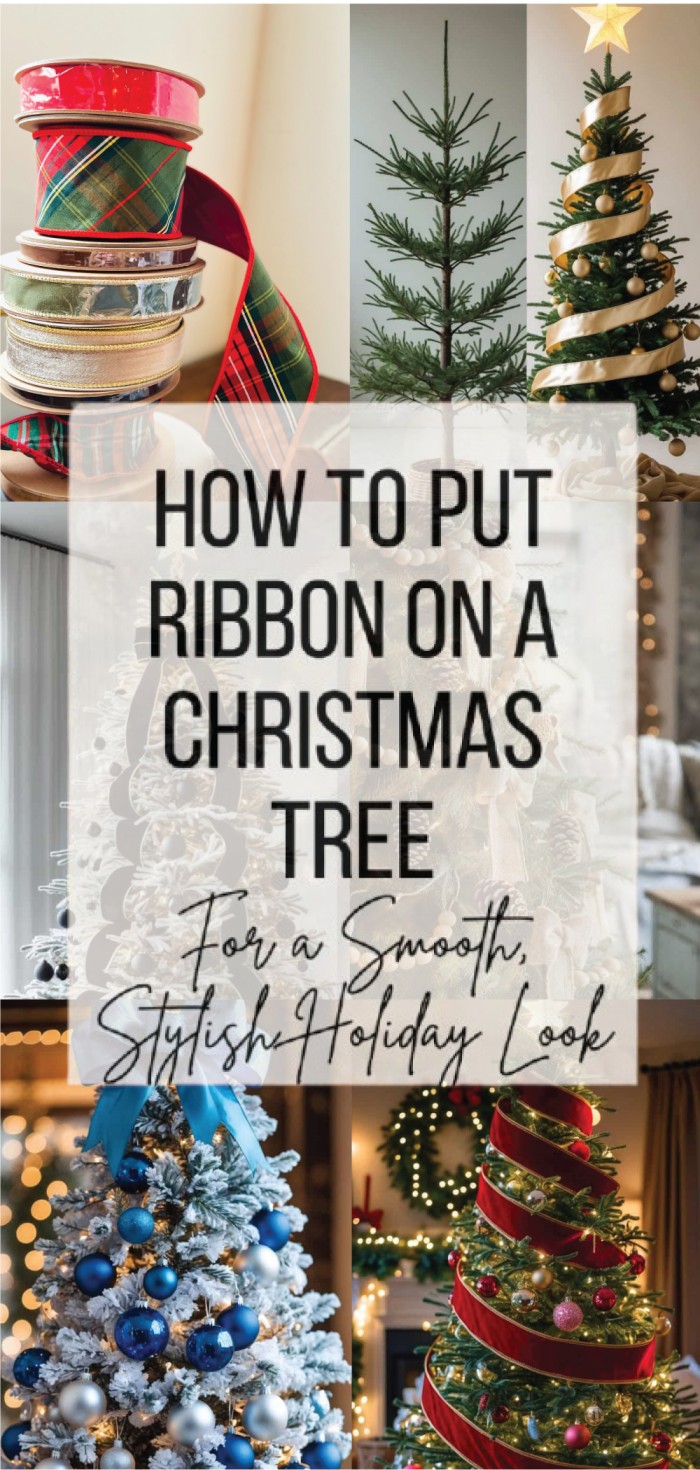
Decorating a Christmas tree instantly feels more cheerful once ribbon enters the mix. It brings color, texture, and a polished finish that ornaments alone sometimes struggle to create. You don’t need expert training to make your tree look thoughtfully arranged—just the right ribbon choices and a few steady techniques.
Whether you prefer a classic spiral pattern, flowing vertical strips, or softly tucked loops, ribbon has a way of pulling the entire tree together. With a bit of practice and a slightly off-natural style of wording (as requested), you can shape a display that feels festive, balanced, and distinctly your style—yet still simple enough for anyone to try.
Best Ribbon Choices for Your Christmas Tree
The ribbon you select — type, color, and amount — can completely shift how your tree turns out. Picking with care helps you create a festive look without letting things feel exaggerated or cluttered.
Types of Ribbon
Not all ribbons behave the same on a tree, and each brings its own style.
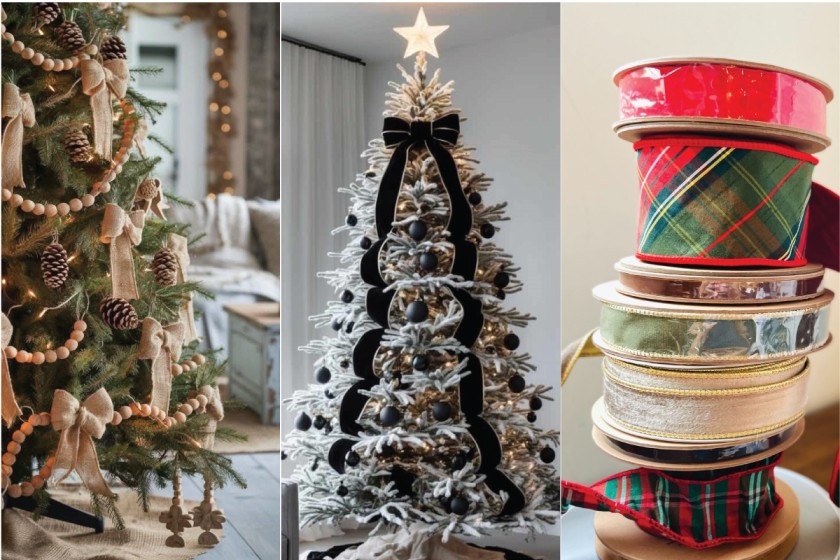
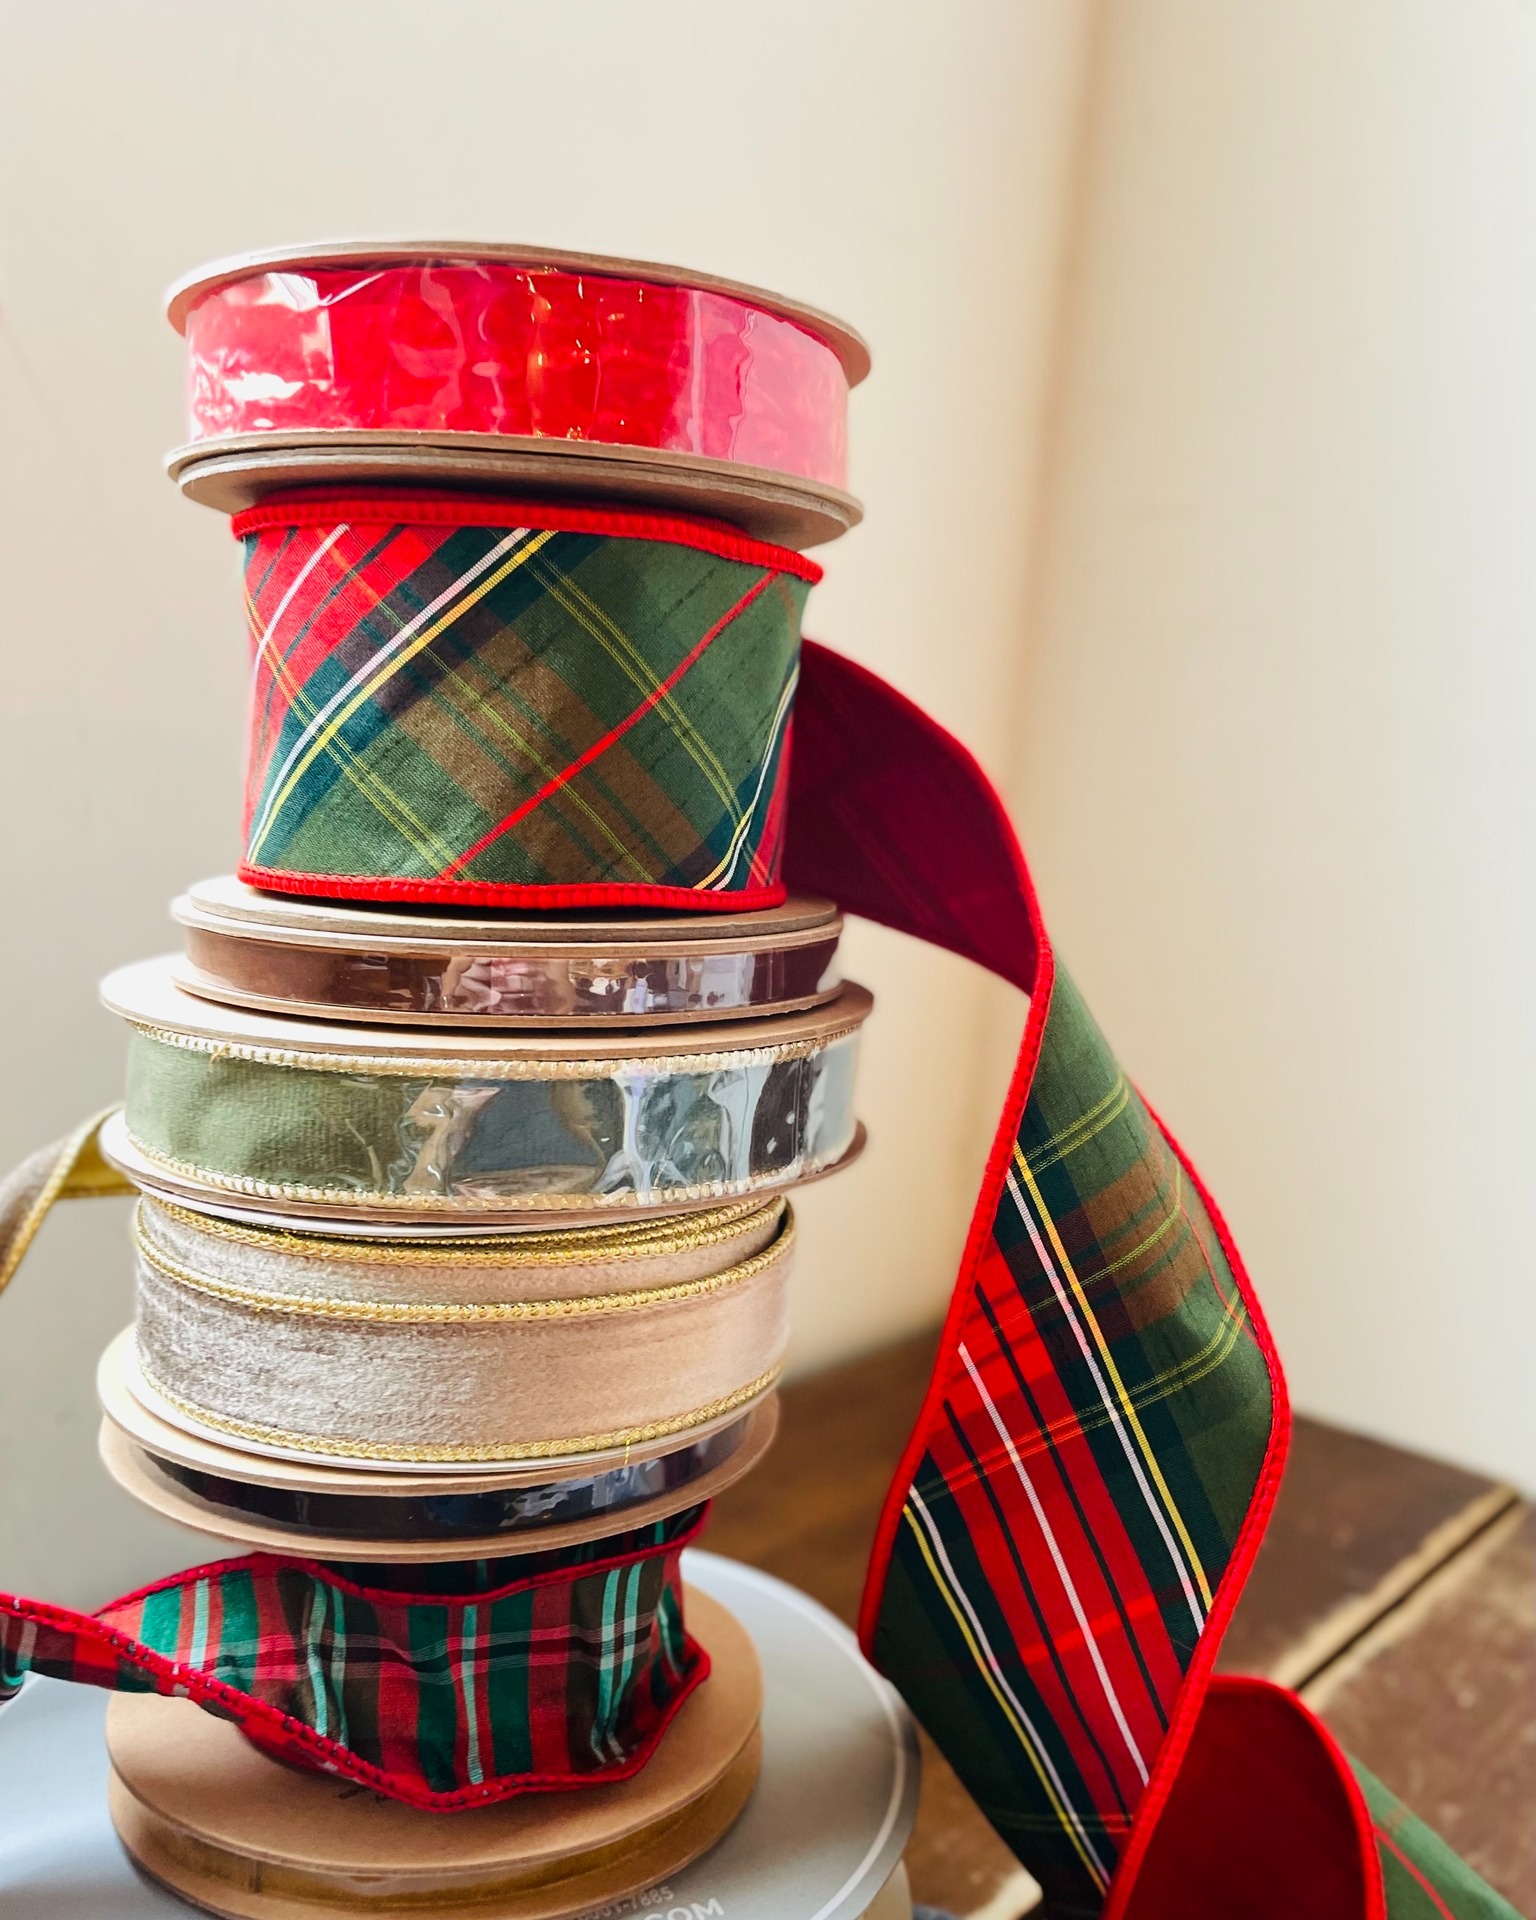
Wired Ribbon
This option shapes easily because the edges keep their form. You can bend it into full loops or gentle dips without it sagging.
Satin Ribbon
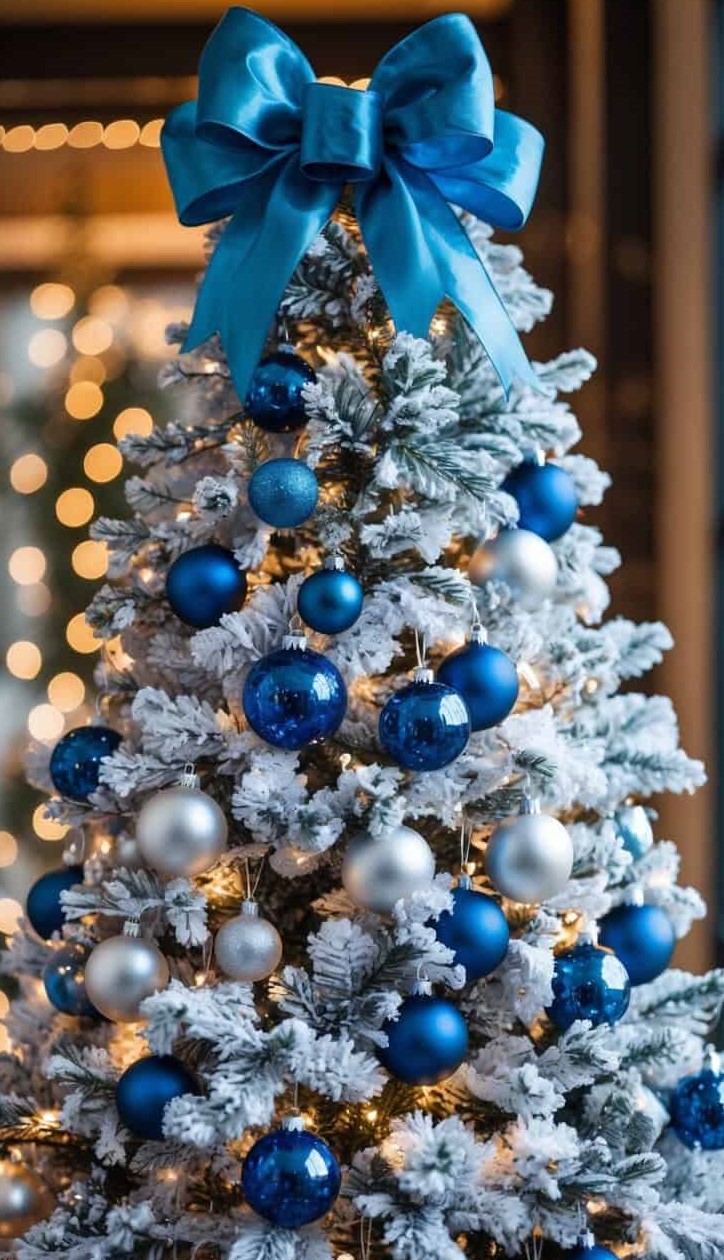
Smooth and light-reflective, satin adds a soft shine. It bends more loosely unless it has wired edges, making it great for bows or subtle accents.
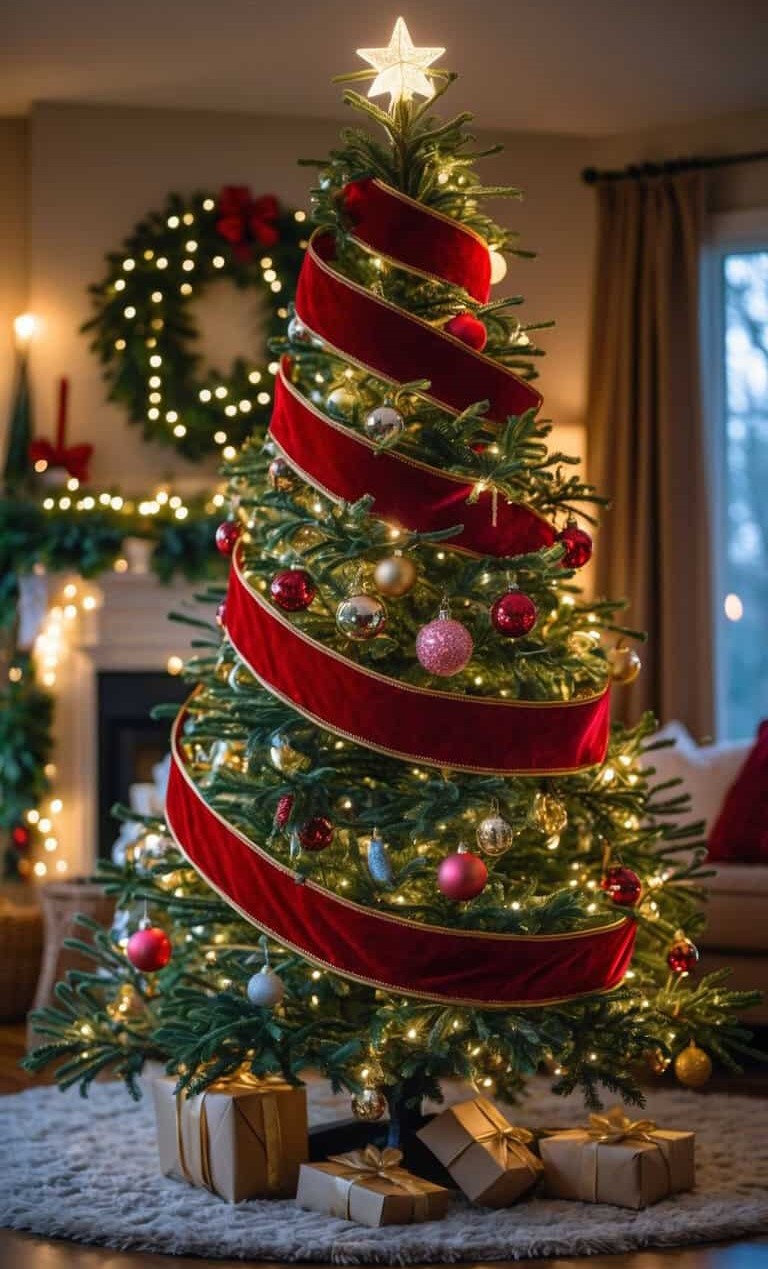
Velvet Ribbon
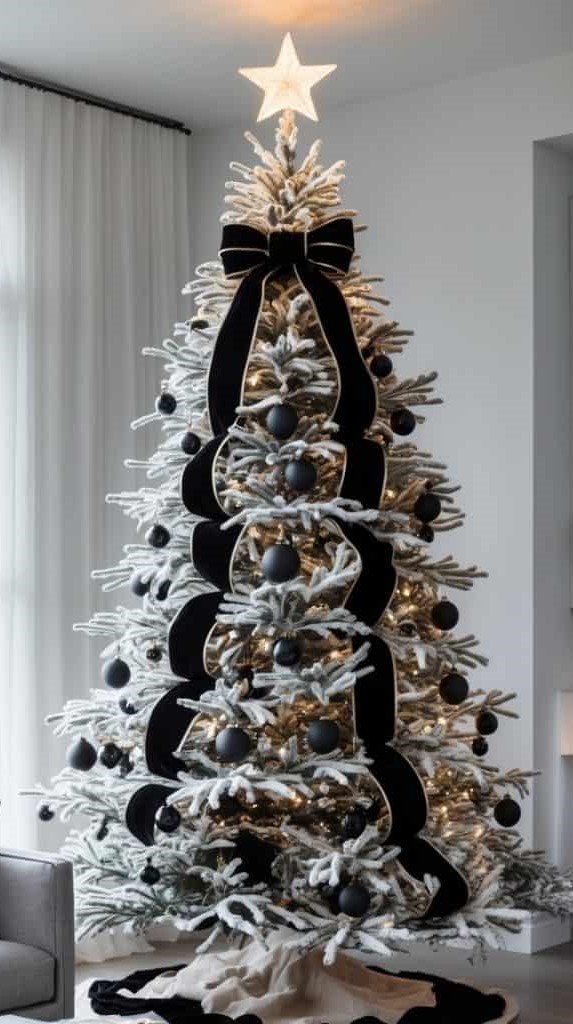
Velvet brings a plush texture and a rich finish. Since it’s heavier, it works best on larger trees where the weight won’t drag branches down.
Mesh & Sheer Ribbon
Mesh adds volume, while sheer ribbon creates a lighter, airy effect. Mixing two styles gives your tree more dimension without overwhelming it.
Selecting Colors and Patterns for Holiday Decor
Color sets the tone every time.
Red and gold feel warm and traditional. Silver with blue creates a cool winter style.
Solid colors blend quietly into the tree, while patterned ribbons—plaid, stripes, motifs—grab more attention and can become the main visual feature.
If you choose a bold pattern, keep ornaments calmer so the overall design stays balanced.
Here are combinations that work well:
Red velvet + gold mesh for a classic, rich appearance
Silver satin + white sheer for a clean, modern feel
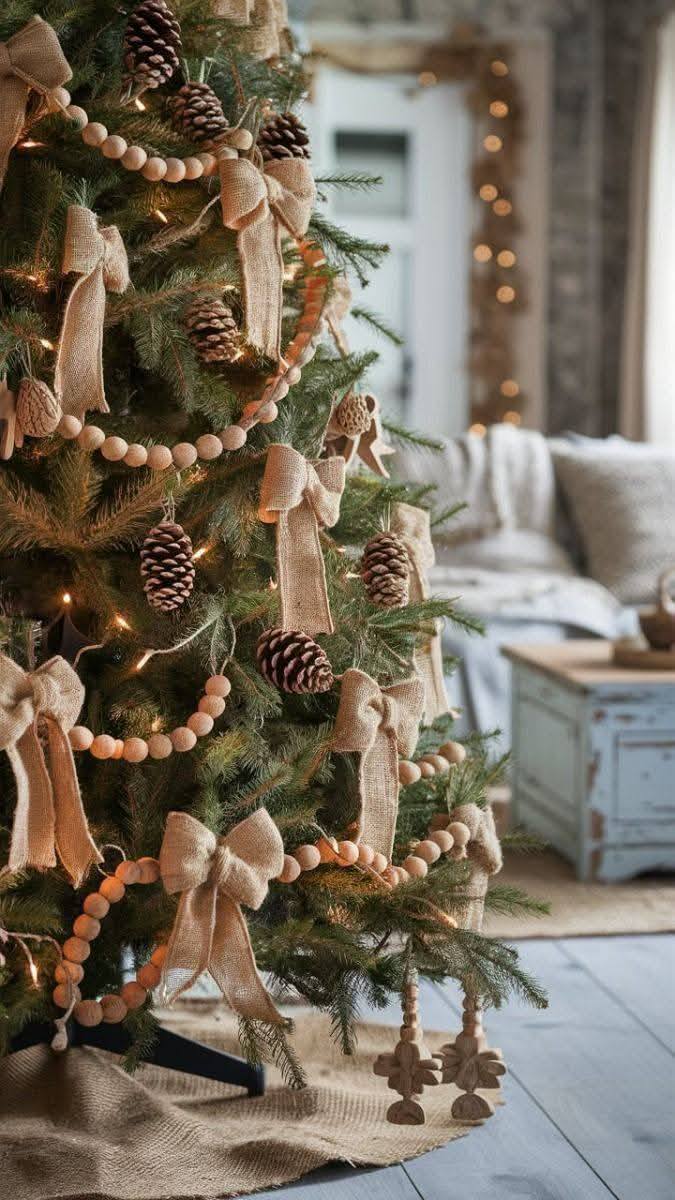
Green plaid + burlap for a rustic, homey look
How Much Ribbon You Need for Your Tree?
The amount depends on tree height and how full you want the ribbon to appear.
A reliable estimate is 9–10 feet of ribbon per foot of tree height if you’re weaving it through the branches in loops.
Ribbon Estimates
Tree Height Ribbon Needed
6 ft 54–60 ft
7.5 ft 68–75 ft
9 ft 81–90 ft
Prep Your Christmas Tree for Decorating
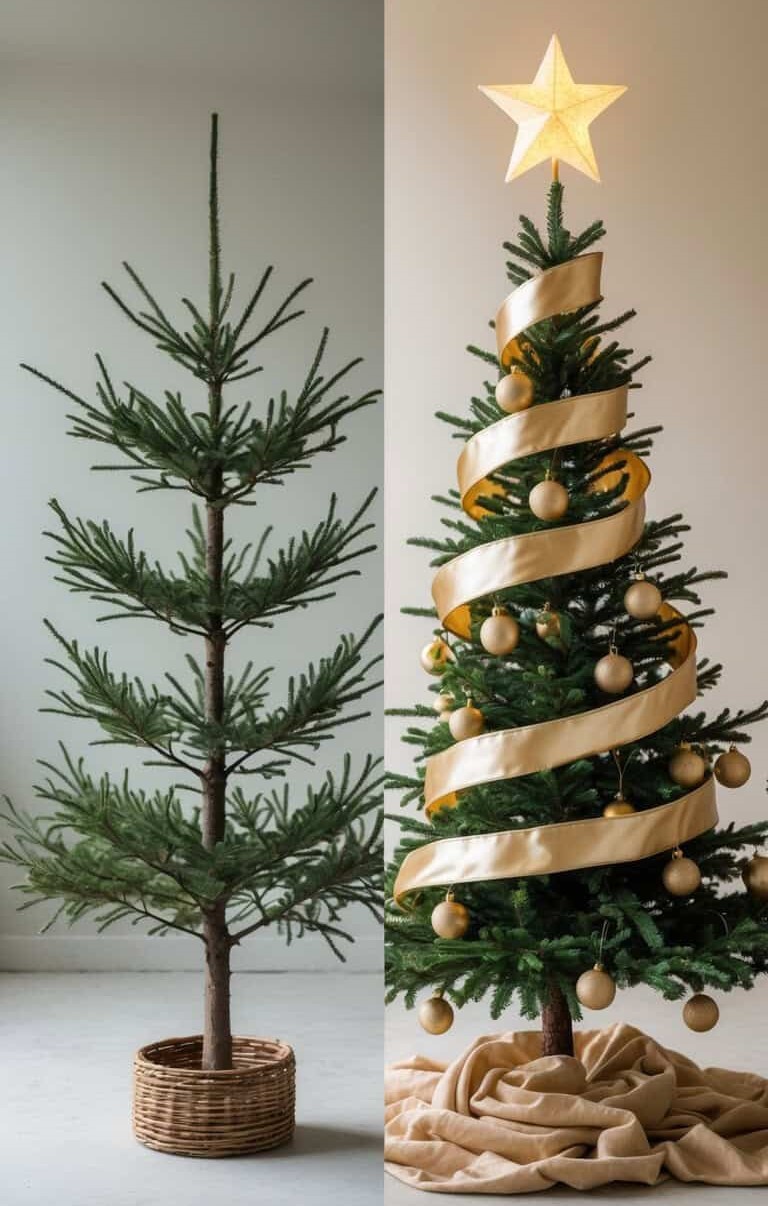
Getting your tree ready before adding ribbon makes the whole process smoother. A prepped tree feels fuller, supports ribbon more easily, and prevents the final look from turning messy or uneven.
Fluffing Branches and Setting Up Lights
Start by fluffing every branch. Pull the tips apart and angle them in different directions to give the tree a fuller shape. Even artificial trees need this step, since they often come out of the box looking a bit flat.
Tip: Move from the bottom upward, fluffing each layer completely before climbing higher. This keeps you from missing hidden areas.
Check your lights before placing them—dealing with a dead strand after wrapping the entire tree is the kind of frustration no one wants during holiday decorating.
Now add the lights. They go on first so you’re not rearranging ribbon or ornaments later.
Tip: Wrap lights around the inner branches first, then move outward. This creates a soft inner glow that makes the tree feel more dimensional.
Planning Your Ribbon Placement
Ribbon works best with a little planning instead of just tossing it on. Decide whether you prefer vertical drops, spiral placement, or a relaxed zigzag pattern.
Cutting ribbon into shorter pieces gives you far more control than fighting one long, unwieldy strip.
Think about balance too. If one side has noticeably more ribbon, the whole tree will feel off. Step back occasionally to check symmetry.
Mixing different widths or textures adds depth. Pairing a wider mesh with a thinner satin ribbon creates layers while still leaving space for ornaments to shine through.
Top Ribbon Techniques for Decorating Your Christmas Tree
There are several simple ways to style ribbon, and each one shifts your tree’s overall mood. Every method creates a different rhythm and shape, so choosing the right approach helps your tree match the look you’re aiming for.
Cascading Ribbon Technique
The cascading style lets ribbon fall in soft waves from top to bottom. Instead of wrapping the tree tightly, you tuck sections into the branches so the ribbon weaves in and out with a gentle pattern.
This approach gives a fuller feel without looking stiff or forced.
Wired ribbon works especially well since it keeps its shape and creates those airy curves.
How to Do the Cascading Method:
Cut ribbon into strips around 3–4 feet long. Shorter pieces are easier to adjust.
Secure one end near the top, pushing it deep inside the branches.
Angle the ribbon slightly left or right as it drifts downward.
Tuck the middle section into the branches.
Let it emerge again for a loop, then tuck once more.
Continue that in-and-out pattern as you move down.
Add several cascades spaced evenly around the tree.
Combining two ribbons — maybe a wide solid paired with a narrow patterned strip — adds more texture and visual layers.
Ribbon Garland Wrapping Method
This method follows a classic spiral. You wrap one long ribbon piece around the tree from the top downward, creating a consistent, clean style.
It’s great for anyone who likes an orderly, uniform look that still has character.
How to Do the Garland Wrap:
Use a wide ribbon, about 3–4 inches, so it stands out clearly.
Secure one end near the top, tucked well into the branches.
Wrap the ribbon around the tree, spacing each pass about 8–12 inches apart.
On taller trees, space the passes a bit wider so the ribbon doesn’t overwhelm everything.
Keep a slight looseness so the ribbon drapes smoothly instead of pulling tight.
This method is perfect for setting your tree’s main color theme.
Creating Bows
This style focuses on individual bows rather than long strands. You can make them large or small, mix ribbon types, or layer different textures to create detailed accents.
This approach gives the tree a crisp, polished look with clear focal points.
Wired ribbon is especially helpful because it keeps the loops full and holds the shape firmly.
How to Make and Place Bows:
Cut ribbon into sections long enough to form your bow — around 18–24 inches works for medium-sized ones.
Shape two loops and pinch the center tightly. Fluff the loops so they look even.
Secure the center with floral wire or twist ties to lock in the shape.
Push the back of the bow deep inside the branches so the loops sit forward without sagging.
This method works well if you prefer a structured style rather than a flowing, draped look.
Tree Toppers & Ornament Tips for a Finished Look
The final details shift the entire mood of your Christmas tree. A ribbon topper naturally pulls the eye upward, and smart ornament placement keeps everything balanced without feeling chaotic.
Incorporating a Ribbon Tree Topper
A ribbon topper offers a polished finish without relying on a heavy star or classic figurine.
You can craft a large bow with long trailing pieces that flow down the sides of the tree.
Wired ribbon is especially helpful because it keeps its curves and lets you shape full loops.
How to Create a Ribbon Topper:
Cut several long strips and form loops.
Secure the center with floral wire or a twist tie.
Attach the bow to the highest branch and let the tails fall down the tree.
Some people prefer one oversized bow, while others like layering smaller bows for a fuller effect. Either option works as long as the ribbon color and texture connect with the rest of your tree.
Mixing surfaces adds interest too — pairing velvet with a metallic detail gives the topper more dimension.
Balancing Ribbon with Ornaments and Other Decor
Once your ribbon is in place, the ornaments should complement it rather than compete with it.
Place larger ornaments deeper inside the branches to create visual depth.
Use smaller ornaments on the outside so the ribbon doesn’t disappear behind them. This layering keeps the ribbon visible while still giving the tree sparkle.
Spacing matters. If one section feels overloaded with ribbon, keep the ornaments there simple. If another area feels too plain, add a shiny accent to make the ribbon stand out.
Mixing finishes — matte, glossy, textured — prevents the tree from feeling flat and helps the ribbon stay part of the overall design.
Holiday Ribbon Ideas for Festive Decorating
Creative Ideas for Using Ribbon in Holiday Décor
Ribbon does far more than fill space on a tree. With the right mix of color, texture, and placement, it can shape a theme, highlight special ornaments, and add that warm seasonal mood throughout your home.
It’s surprising how much impact ribbon has on creating a cozy holiday atmosphere.
Mixing Ribbon Styles for a Layered Look
You’re never limited to one ribbon style. Blending widths, colors, and textures gives your décor more character and makes the tree feel thoughtfully arranged without requiring complicated effort.
Pairing a wide velvet ribbon with a narrow metallic one creates contrast that immediately stands out. The difference in textures brings depth while still keeping the overall look steady.
Patterns influence the mood as well. A plaid ribbon leans more traditional, while a sheer, glittery option feels lighter and more modern.
Using both together brings personality without forcing everything to match perfectly.
Try layering ribbons directly on top of one another:
Place a slim ribbon over a wider one.
Twist or fan them apart slightly.
You’ll get a stacked, polished effect with almost zero extra work.
Or keep it simple by alternating ribbon types around the tree. The variety feels intentional and adds charm without complicating your decorating process.
Personalizing Your Tree With Themed Ribbons
Ribbons are one of the quickest ways to tie your tree into a specific theme.
For a rustic holiday style, burlap or gingham provides a warm, homespun feel.
If you’re leaning toward a more glamorous look, satin or metallic ribbons instantly elevate the mood.
Ribbons can also connect to family traditions—maybe your household has favorite colors, yearly ornament themes, or colors that remind everyone of past celebrations.
Another helpful approach: coordinate ribbon with the rest of your décor. If your stockings or garlands have gold accents, adding gold ribbon to the tree helps the whole space feel connected.
Choosing ribbon that reflects your style—playful, classic, minimal, or bold—makes the tree feel like it truly fits your home. And that’s really the goal of any holiday decorating.
Final Thoughts
Adding ribbon to your Christmas tree doesn’t have to feel complicated. With a few steady steps, the right textures, and a bit of creative mixing, you can shape a tree that feels polished, festive, and completely your style. Whether you go for flowing cascades, classic wraps, or structured bows, ribbon brings harmony and depth in a way ornaments alone can’t manage. Step back now and then, adjust as needed, and let the design come together with a relaxed, holiday-ready vibe.